Campaign:NHNE/Equipment/Queen of the Belt/Floorplans
Deck Organisation
Decks are stacked londitudinally; Deck 1 is forward; Deck 8 aft.
Conventionally, the decks are displayed with Top the the top, Port to clockwise, Bottom at the bottom, and Starboard to the left. This is because the depiction of the decks is looking aft.
There are two lifts. Top Lift reaches from Deck 1 to deck 7 and is for crew use. Bottom Lift is for Passenger user and reached from decks 3 to 5
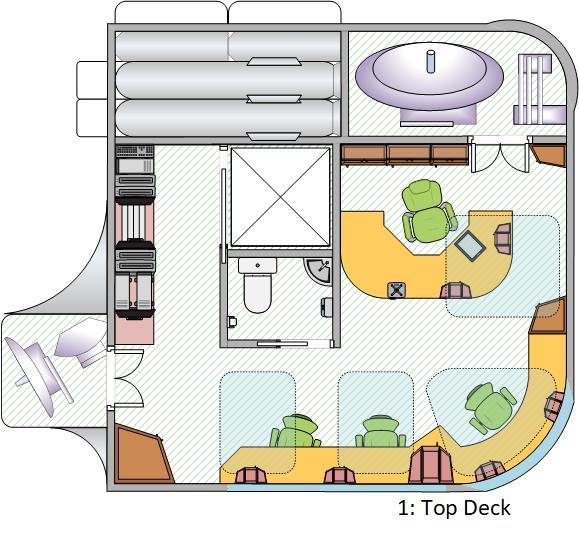
Deck 1: Bridge
Missile Racks
There are 8 missile tubes and 6 barrel boxes in this space. Any/All may be launched at any time, but there is control circuitry for just 3 which limits effective salvo size.
The tubes and boxes are externally loaded. The ordnance can orientate, and be guided, in any direction once clear of the tube/box.
Sensors and Comms Room
This space includes sensor and communications equipment. It is accessed via a manually operated hatch behind the captain's chair on the bridge.
Bridge
A "U" shaped space comprising a Captains Position, 3 Bridge Crew Positions and (to starboard) racking for the ships computer and associated internal control systems. The seating is arranged such that the ship's Starboard is to the sitters right.
There is an emergency bubble under each desk.
Various lockers are distributed about the room.
n.b. The Captains Position is the only one from which computer software upgrades may be installed.
The Controls at each of the various positions are configurable, and there are (quite unexpectedly sophisticated for the system, and relatively new) holo-projectors at each station.
Top Lift
Main crew lift. The lift platform has a bypass hatch in the floor and the wall of the shaft has hand/foot holds that allow the space to be used as a climb-way should the lift become stuck or otherwise disabled.
Note that the doors to the lift-shaft allow the shaft to act as an inter-deck airlock if necessary and thus all are (normally) interlocked.
Sensor Array Room
Further space for sensor antennae accessed from the bridge. Note the thin walls. These are not self-sealing, hence the hatch to the bridge should be kept shut at all times when not in use.
Bridge Fresher
A useful facility given the layout of the vessel.
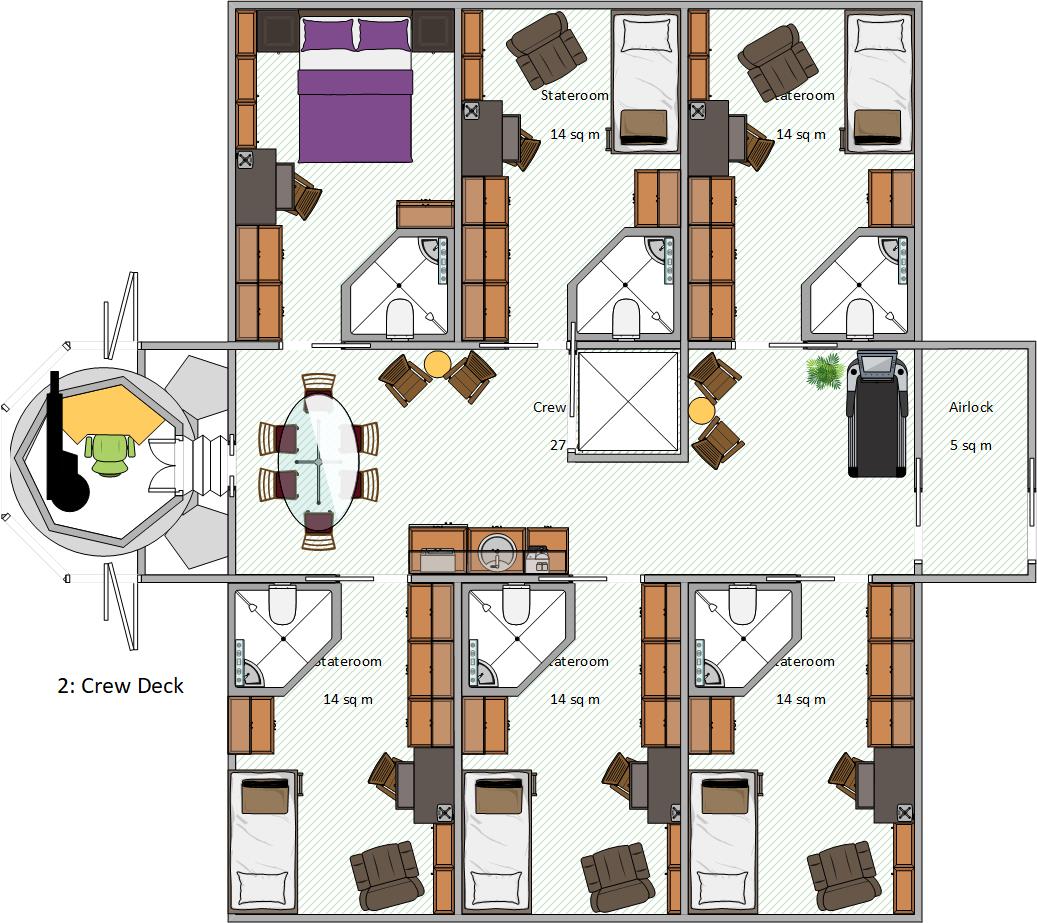
Deck 2: Crew
Captain's Cabin
This cabin is set out with a double bed, and bedside cabinets. The entire bed can fold up into the wall, revealing a fold-down table and bench seats able to seat 6.
Otherwise, the cabin has fairly standard fresher unit, work desk and storage spaces. The Desk has a holo-projector and the large blank wall to port can be configured for decoration or computer display.
This cabin is assigned to Indrani Carter
Crew Cabin #2
This cabin has fairly standard double bunk, fresher unit, work desk and storage spaces. The desk has a holo-projector.
This cabin is assigned to Nālani Shiraishi. Some of the more standard appearance is in the process of modification to reflect an Okami aesthetic, with shoji-style walls and minimalist decor.
Crew Cabin #3
As Crew Cabin #2
Aboard the Queen, this cabin had been used as a waste-store by the interlopers. It was cleared and reinstated as a Crew Cabin by the returning crew.
This cabin is assigned to Reven Stiilpahth
Laser Turret
This is a triple turret, but is disguised as a sensor pod by a series of shutters that can open to reveal the turret beneath.
Access is via a retractable tunnel connected to the Crew Common Area. The Turret can rotate through 360 degrees and elevate from -10 to +90 degrees. Access is only possible when elevated at 0 degrees.
n.b. Power for the laser weapons is drawn from the main starboard side power bus only.
Crew Common Area
At the starboard end, there is a table able to seat six people, a side table with two seats and an area for basic snack & drink preparation. This area includes a pot for hot drinks (ideally coffee), a microwave and a sink - but also includes the machine for washing clothes and linen for the entire ship.
At the port end should be a further table and chairs and the ships exercise machine. These had been recovered from the rubbish pile of the interlopers in a desperate state.
Top Lift
See lift description on Deck 1
Crew Airlock
This airlock is arranged such that large items of equipment can be manoeuvred through it in a straight line if both doors are opened at once (e.g. when connected to a station). Normally, these doors are fully interlocked.
Crew Cabin #4
As Crew Cabin #2
Aboard the Queen, this cabin had been converted to a laboratory space by the interlopers, with the bunk-space having been converted a storage cupboard and isolation chamber. This was then returned to use as a bunk by the new occupants. This cabin was that in which the body of the murdered student (Angela Hilbert) was discovered.
This cabin is assigned to Pranit Kilrane-Bewoor
Crew Cabin #5
As Crew Cabin #2
This cabin is assigned to Magdalena Holtz
Crew Cabin #6
As Crew Cabin #2
This cabin is assigned to Arnwulf Lugersen
Deck 3: High Class Passengers
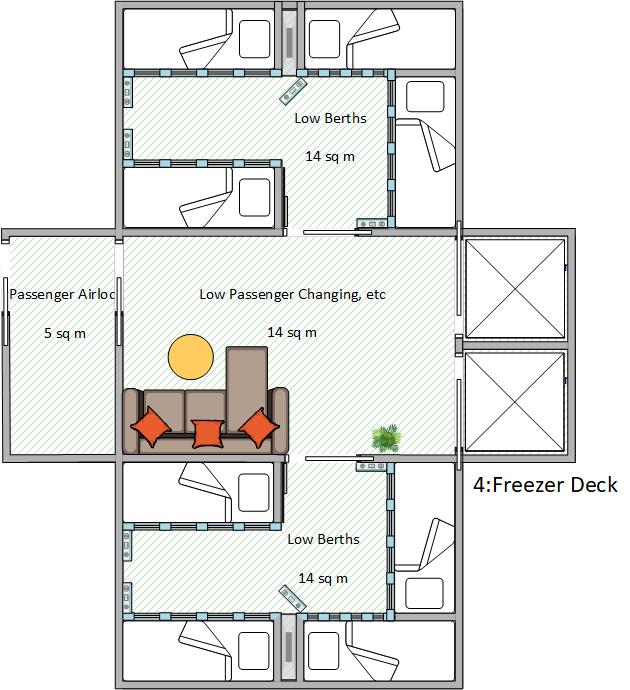
Deck 4: Low Passengers and Passenger Entrance
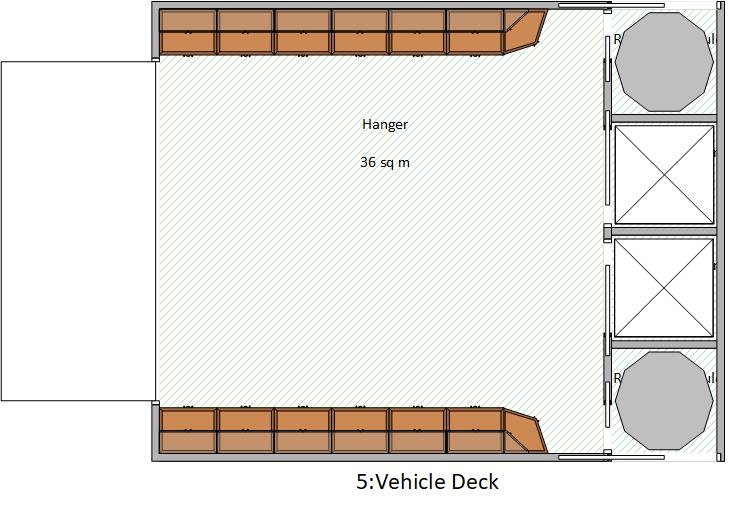
Deck 5: Speeder Hanger
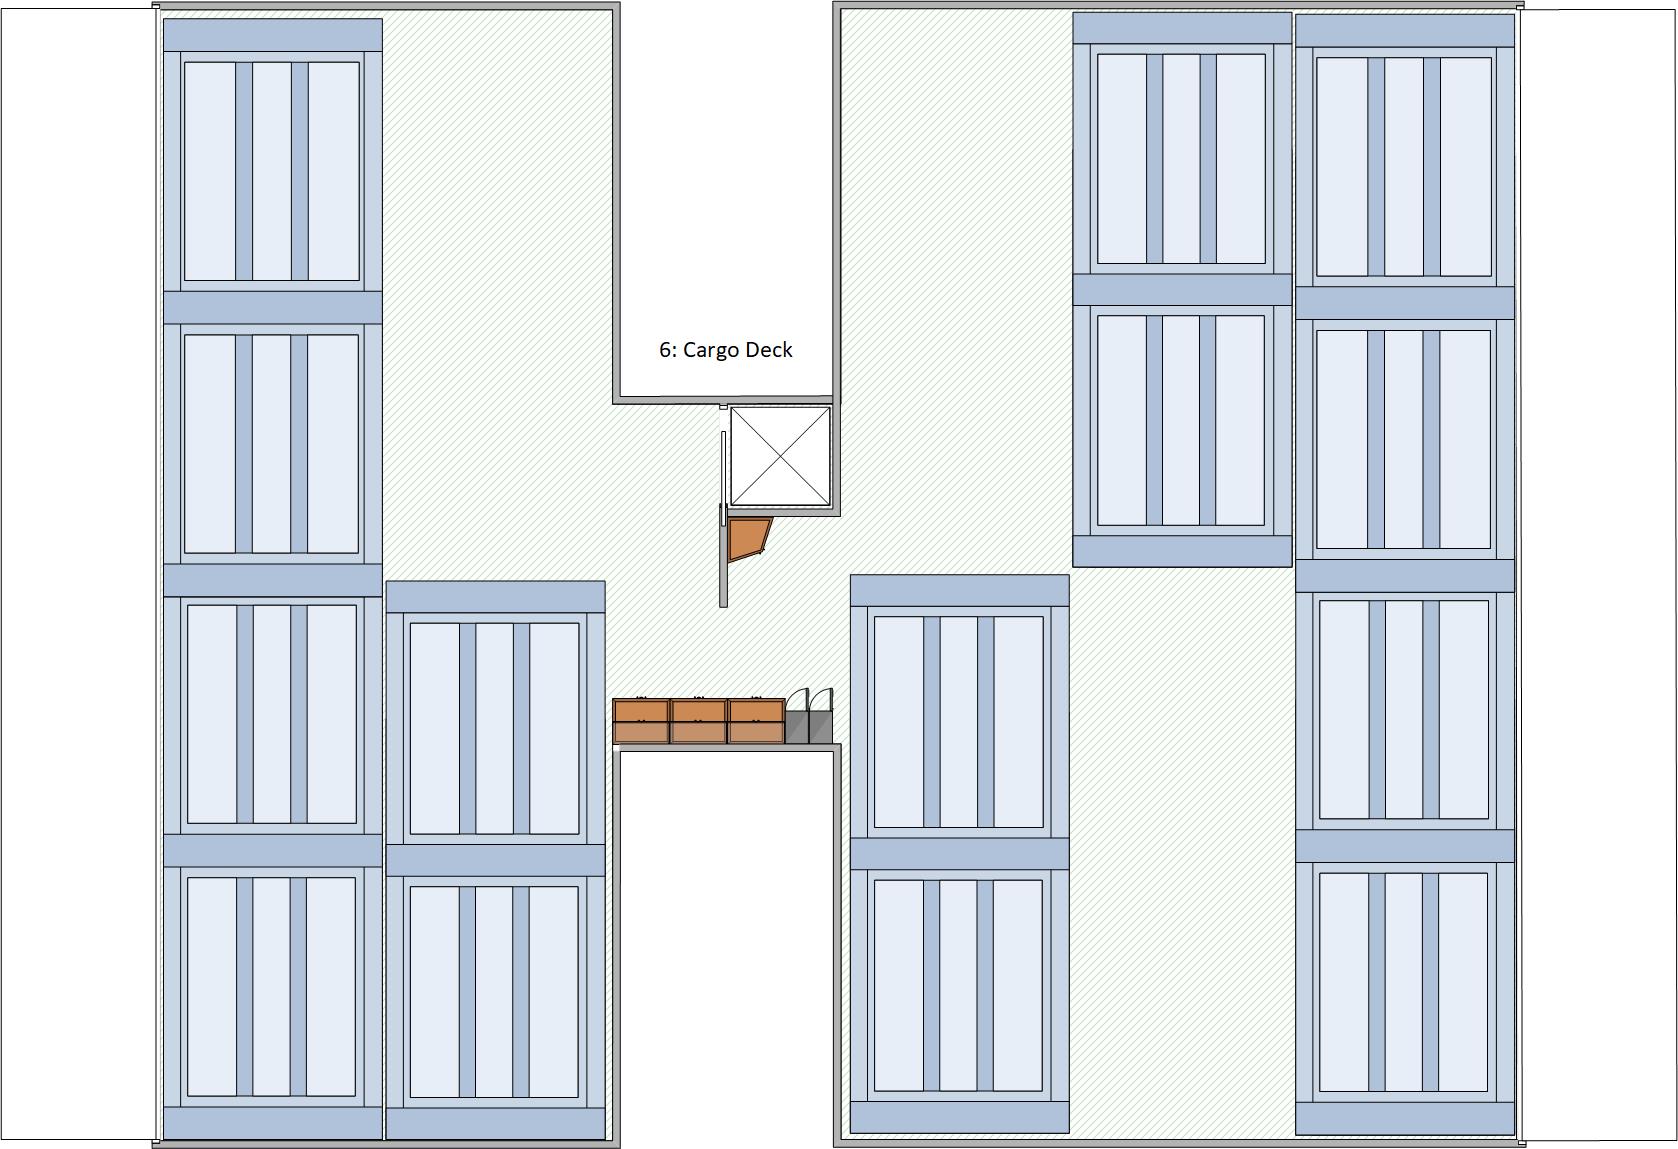
Deck 6: Cargo Bay
Deck 7: Power
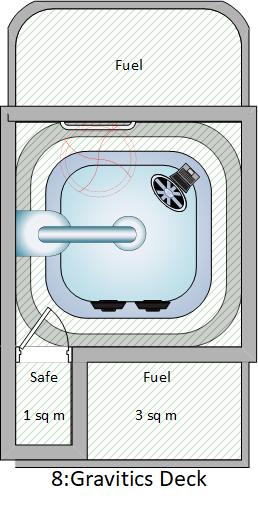
Deck 8: Manoeuver
Sources
- Artist: BackworldTraveller
