Difference between revisions of "Campaign:NHNE/Equipment/Queen of the Belt/Floorplans"
| Line 1: | Line 1: | ||
| + | ==Deck Organisation== | ||
| + | Decks are stacked londitudinally; Deck 1 is forward; Deck 8 aft. | ||
| + | |||
| + | Conventionally, the decks are displayed with Top the the top, Port to clockwise, Bottom at the bottom, and Starboard to the left. This is because the depiction of the decks is looking aft. | ||
| + | |||
| + | There are two lifts. Top Lift reaches from Deck 1 to deck 7 and is for crew use. Bottom Lift is for Passenger user and reached from decks 3 to 5 | ||
==Deck 1: Bridge== | ==Deck 1: Bridge== | ||
[[File:Queen of the Night - Deck 1.jpg]] | [[File:Queen of the Night - Deck 1.jpg]] | ||
| + | ===Missile Racks=== | ||
| + | There are 8 missile tubes and 6 barrel boxes in this space. Any/All may be launched at any time, but there is control circuitry for just 3 which limits effective salvo size. | ||
| + | |||
| + | The tubes and boxes are externally loaded. The ordnance can orientate, and be guided, in any direction once clear of the tube/box. | ||
| + | |||
| + | ===Sensors and Comms Room=== | ||
| + | This space includes sensor and communications equipment. It is accessed via a manually operated hatch behind the captain's chair on the bridge. | ||
| + | |||
| + | ===Bridge=== | ||
| + | A "U" shaped space comprising a Captains Position, 3 Bridge Crew Positions and (to starboard) racking for the ships computer and associated internal control systems. The seating is arranged such that the ship's Starboard is to the sitters right. | ||
| + | |||
| + | There is an emergency bubble under each desk. | ||
| + | |||
| + | Various lockers are distributed about the room. | ||
| + | |||
| + | n.b. The Captains Position is the only one from which computer software upgrades may be installed. | ||
| + | |||
| + | The Controls at each of the various positions are configurable, and there are (quite unexpectedly sophisticated for the system, and relatively new) holo-projectors at each station. | ||
| + | |||
| + | ===Top Lift=== | ||
| + | Main crew lift. The lift platform has a bypass hatch in the floor and the wall of the shaft has hand/foot holds that allow the space to be used as a climb-way should the lift become stuck or otherwise disabled. | ||
| + | |||
| + | Note that the doors to the lift-shaft allow the shaft to act as an inter-deck airlock if necessary and thus all are (normally) interlocked. | ||
| + | |||
| + | ===Sensor Array Room=== | ||
| + | Further space for sensor antennae accessed from the bridge. Note the thin walls. These are not self-sealing, hence the hatch to the bridge should be kept shut at all times when not in use. | ||
| + | |||
| + | ===Bridge Fresher=== | ||
| + | A useful facility given the layout of the vessel. | ||
| + | |||
==Deck 2: Crew== | ==Deck 2: Crew== | ||
[[File:Queen of the Night - Deck 2 v2.jpg]] | [[File:Queen of the Night - Deck 2 v2.jpg]] | ||
Revision as of 07:26, 30 April 2021
Deck Organisation
Decks are stacked londitudinally; Deck 1 is forward; Deck 8 aft.
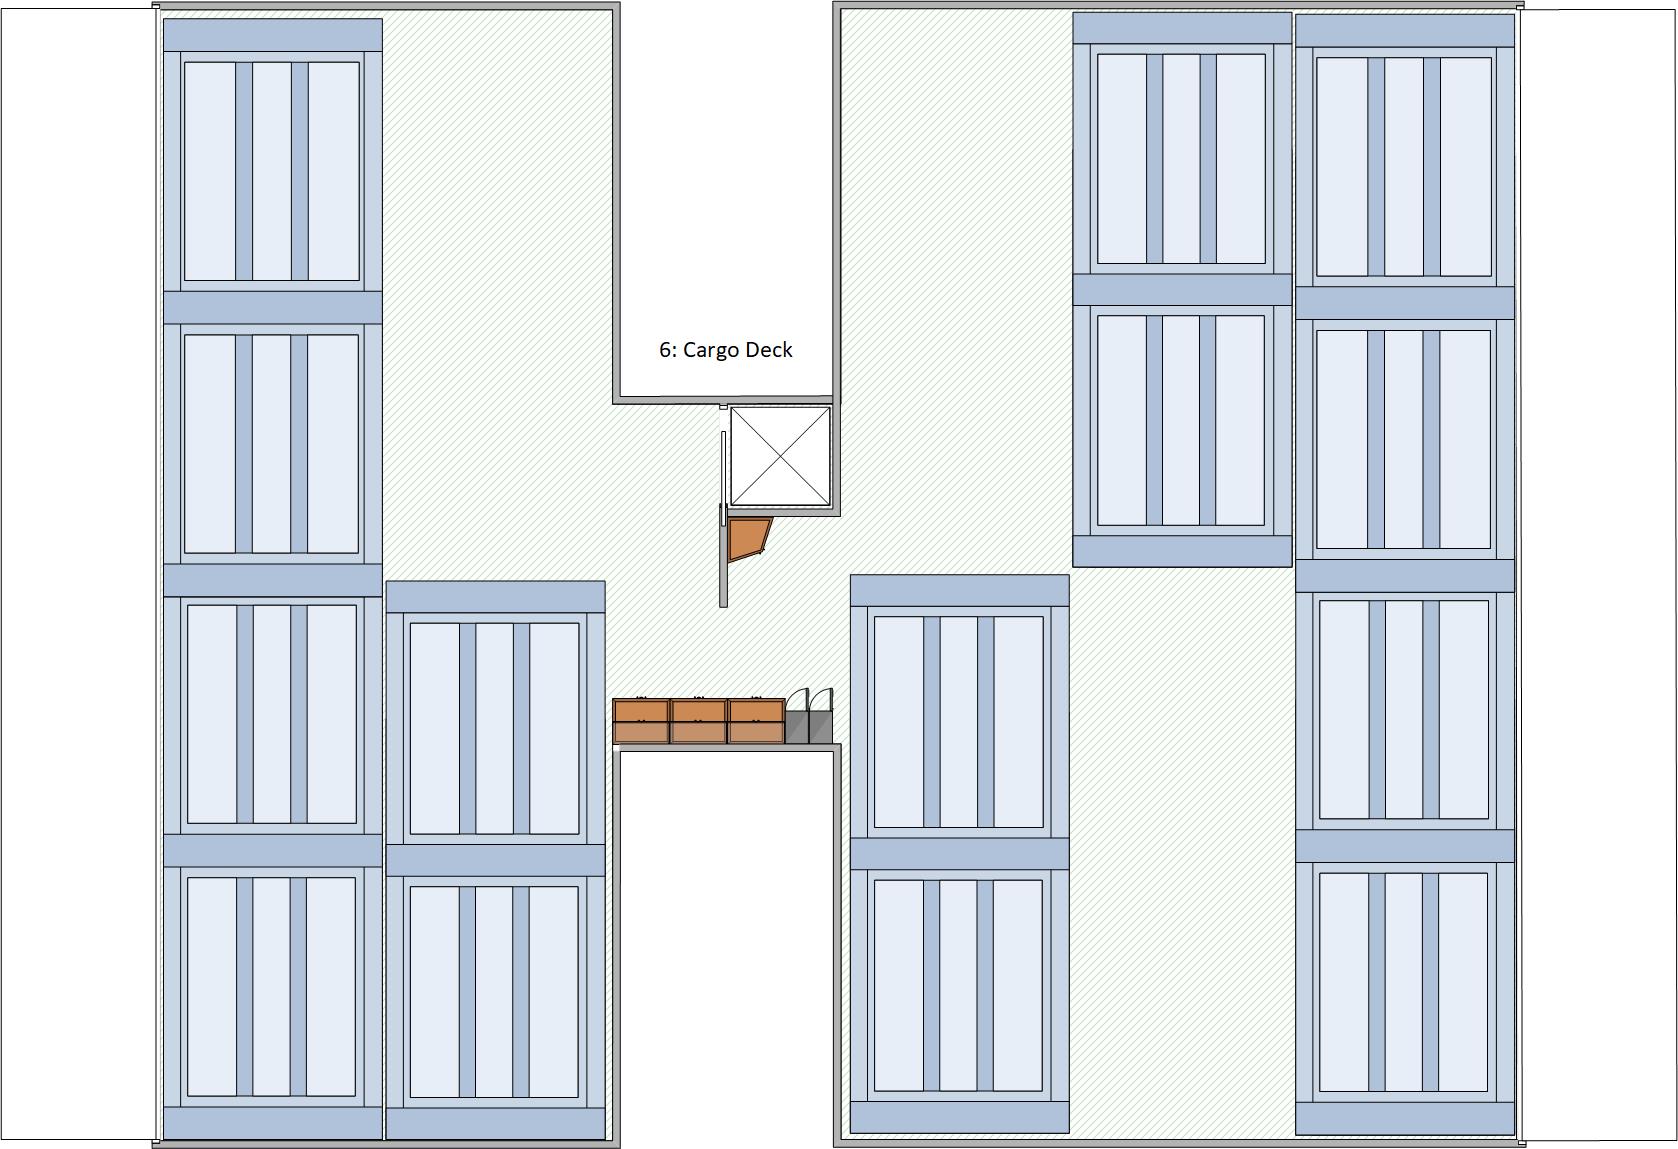
Conventionally, the decks are displayed with Top the the top, Port to clockwise, Bottom at the bottom, and Starboard to the left. This is because the depiction of the decks is looking aft.
There are two lifts. Top Lift reaches from Deck 1 to deck 7 and is for crew use. Bottom Lift is for Passenger user and reached from decks 3 to 5
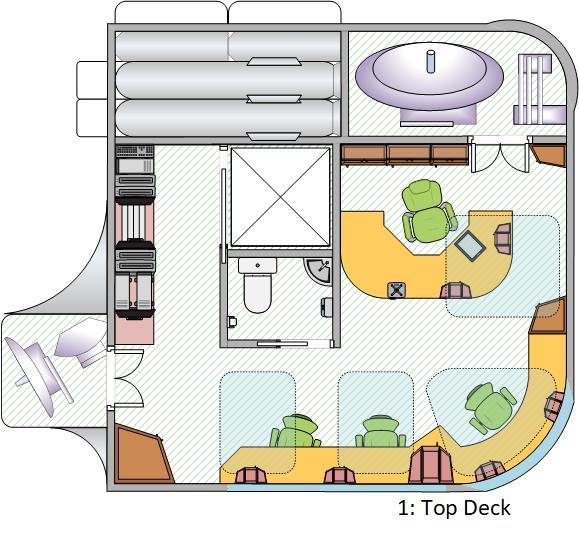
Deck 1: Bridge
Missile Racks
There are 8 missile tubes and 6 barrel boxes in this space. Any/All may be launched at any time, but there is control circuitry for just 3 which limits effective salvo size.
The tubes and boxes are externally loaded. The ordnance can orientate, and be guided, in any direction once clear of the tube/box.
Sensors and Comms Room
This space includes sensor and communications equipment. It is accessed via a manually operated hatch behind the captain's chair on the bridge.
Bridge
A "U" shaped space comprising a Captains Position, 3 Bridge Crew Positions and (to starboard) racking for the ships computer and associated internal control systems. The seating is arranged such that the ship's Starboard is to the sitters right.
There is an emergency bubble under each desk.
Various lockers are distributed about the room.
n.b. The Captains Position is the only one from which computer software upgrades may be installed.
The Controls at each of the various positions are configurable, and there are (quite unexpectedly sophisticated for the system, and relatively new) holo-projectors at each station.
Top Lift
Main crew lift. The lift platform has a bypass hatch in the floor and the wall of the shaft has hand/foot holds that allow the space to be used as a climb-way should the lift become stuck or otherwise disabled.
Note that the doors to the lift-shaft allow the shaft to act as an inter-deck airlock if necessary and thus all are (normally) interlocked.
Sensor Array Room
Further space for sensor antennae accessed from the bridge. Note the thin walls. These are not self-sealing, hence the hatch to the bridge should be kept shut at all times when not in use.
Bridge Fresher
A useful facility given the layout of the vessel.
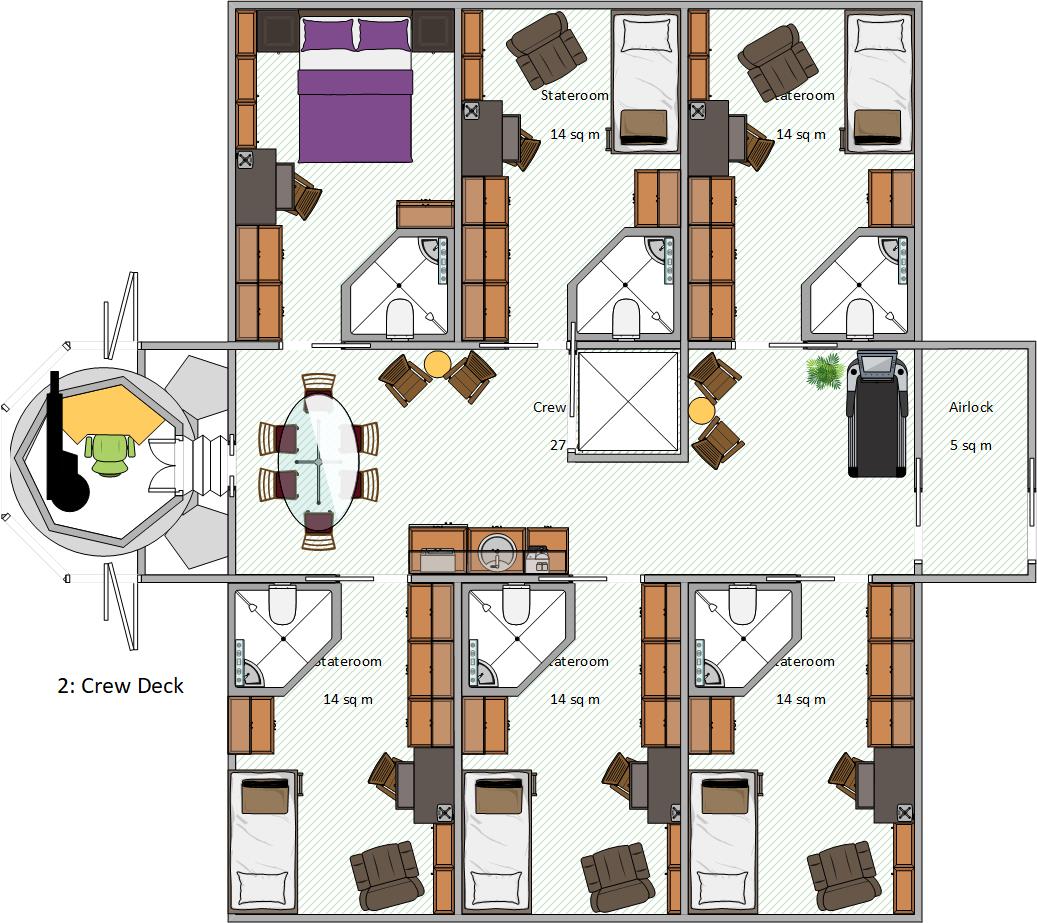
Deck 2: Crew
Deck 3: High Class Passengers
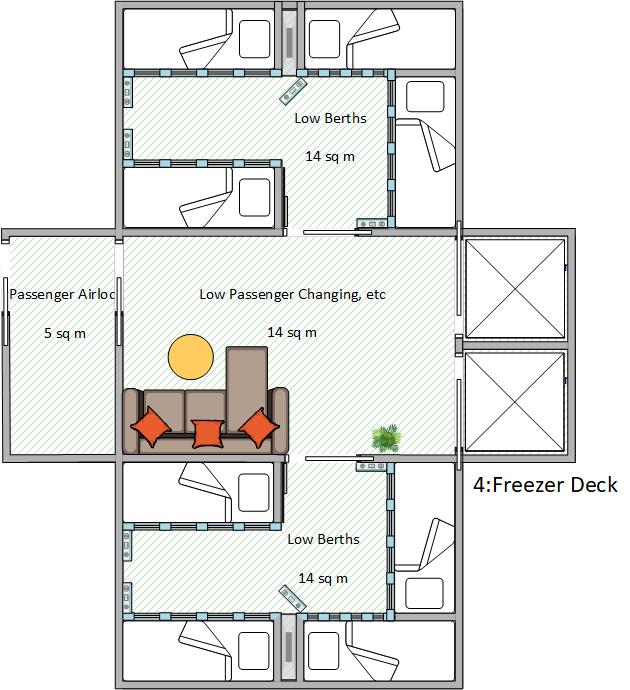
Deck 4: Low Passengers and Passenger Entrance
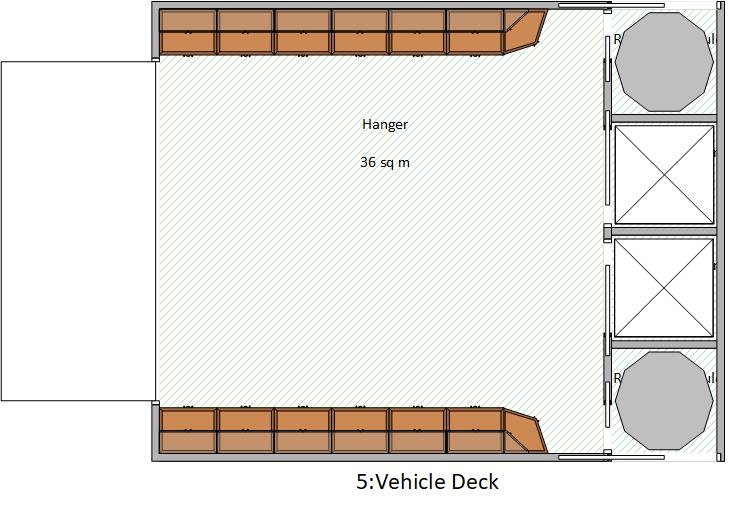
Deck 5: Speeder Hanger
Deck 6: Cargo Bay
Deck 7: Power
Deck 8: Manoeuver
Sources
- Artist: BackworldTraveller
